For many organizations, Microsoft Active Directory represents the single, canonical source of truth for the identities of employees and trusted users. When building and deploying cloud‑based business applications, the Azure platform is particularly attractive due to its native integration with Active Directory.
Microsoft Azure supports a wide range of standards‑based federated identity and single sign‑on technologies to help developers authenticate, consume, and make decisions based on the identities of users defined in Active Directory. However, there are some scenarios where it is challenging or undesirable to implement these standards‑based technologies at the application layer, such as:
- When moving existing applications to the cloud, it can be difficult to modernize the underlying authentication system to support single sign‑on.
- When building a microservices‑style application, it is preferable to centralize the authentication and access control functions rather than repeat them over and over in each microservice.
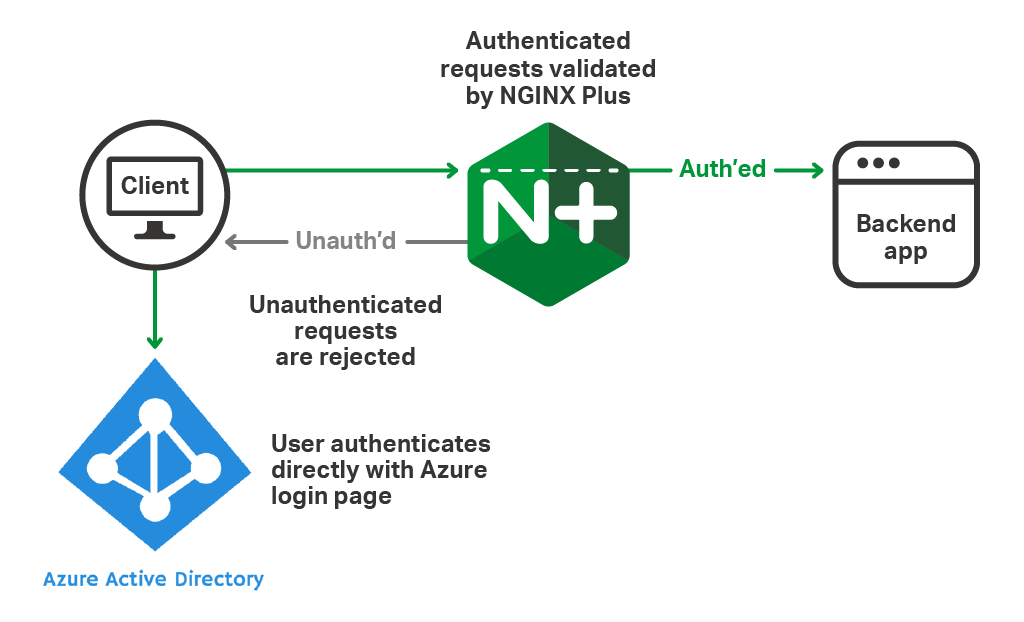
OpenID Connect has emerged as a technology that is equally applicable to both single sign‑on for applications and to API client authentication. When NGINX Plus is deployed as a reverse proxy or API gateway for these scenarios, we can offload the validation of OpenID Connect tokens to NGINX Plus. This approach means that authentication happens in one place, and the application only deals with successfully authenticated clients.

In this blog post we show how to use NGINX Plus to validate OpenID Connect tokens issued by Azure, and also to apply fine‑grained access control based on group membership assignments made in Azure Active Directory.
Validating OpenID Connect Logins with NGINX Plus
The OpenID Connect authentication process ultimately issues an identity token to the user/client, which can then be presented as a proof of authentication when accessing protected resources. The identity token uses the JSON Web Token (JWT) standard, which is an extremely flexible and portable data format for carrying user information.
Note: For an introduction to JWTs, see Authentication and Content‑Based Routing with JWTs and NGINX Plus.
Once a web browser or API client is successfully authenticated by the Azure login system, Azure can issue it an identity token (as a JWT). A sample, decoded Azure identity token (Id_token) is shown below. The token contains several useful pieces of user information, including the email address and the user’s real name, which can be used by an application to provide a personalized user experience. Note that this Azure identity token also contains a list of group memberships (lines 13–17) as a JSON array.
Validating Azure JWTs with NGINX Plus
Basic configuration for validating Azure JWTs is as simple as adding two lines to your NGINX Plus configuration.
This configuration can apply to an entire site or to specific URIs on a per‑location basis. The auth_jwt directive specifies that a valid JWT must be provided by the client. A JWT is considered to be valid when the following conditions are met:
- The signature can be validated with the key found in the
auth_jwt_key_file(matching on thekidheader field if present). - The JWT is presented inside the validity period, when defined by one or both of the
nbf(not before) andexp(expires) claims. (See lines 7–8 of the sample JWT above; the times are represented in UNIX epoch time.)
By having NGINX Plus perform JWT validation, we can offload the authentication process from the backend applications and APIs. Not only does this increase the backends’ capacity for processing requests, it also ensures that only properly authenticated requests ever reach the backend.
To validate Azure identity tokens, we need to provide NGINX Plus with Microsoft’s public JWT signing keys. We store these signing keys adjacent to our NGINX Plus configuration so the target filename matches that specified by the auth_jwt_key_file directive.
$ curl -sS https://login.microsoftonline.com/common/discovery/keys > /etc/nginx/azure.jwkMicrosoft maintains several signing keys simultaneously so that keys can be rotated without invalidating tokens already issued. It is therefore prudent to routinely refresh this file with a cron(8) job.
Role-Based Access Control
As seen in the sample JWT above, a significant advantage of using OpenID Connect identity tokens with Microsoft Azure is that they can also contain group membership information. With this information present in the identity token we can use NGINX Plus not only to validate the token but also to perform role‑based access control based on the group memberships.
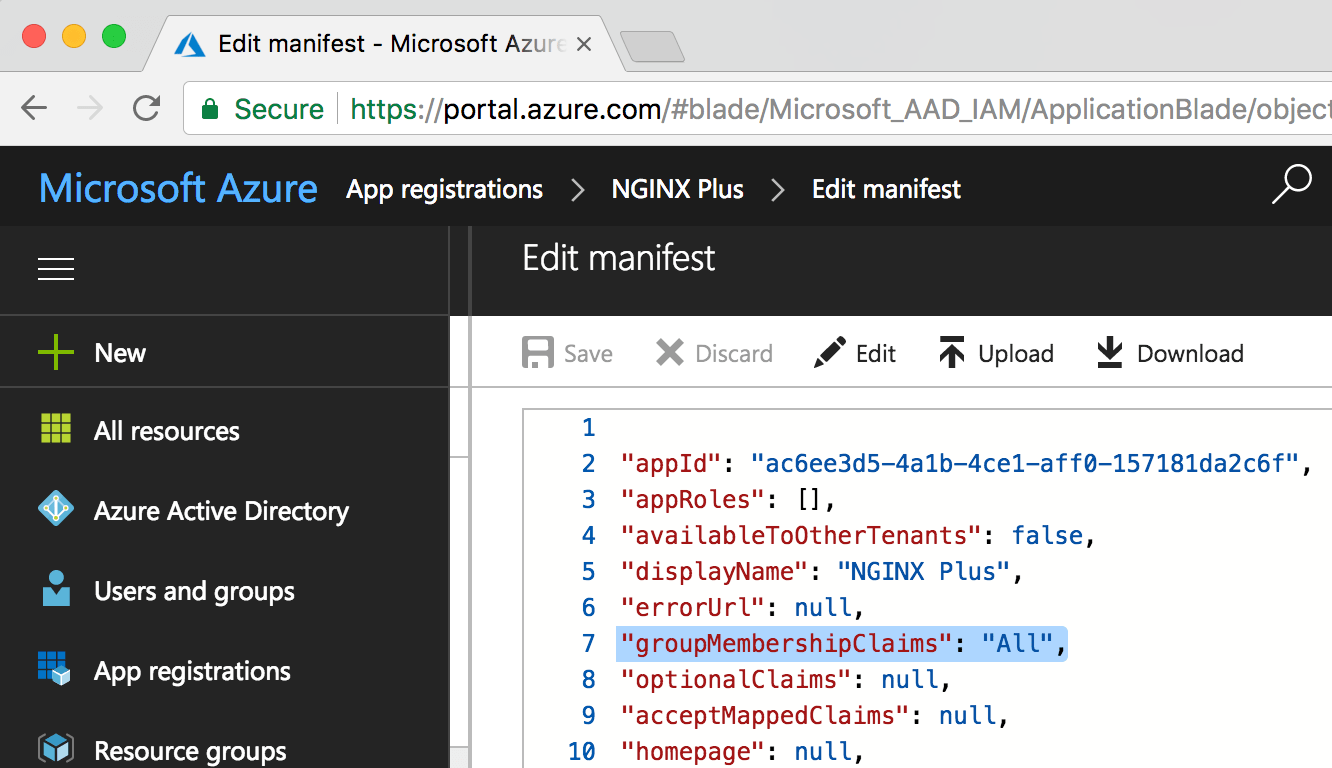
To ensure that group memberships appear in the groups JWT claim, set the value of groupMembershipClaims in the App registration manifest to "SecurityGroup", or to "All" to also include Office 365 groups.

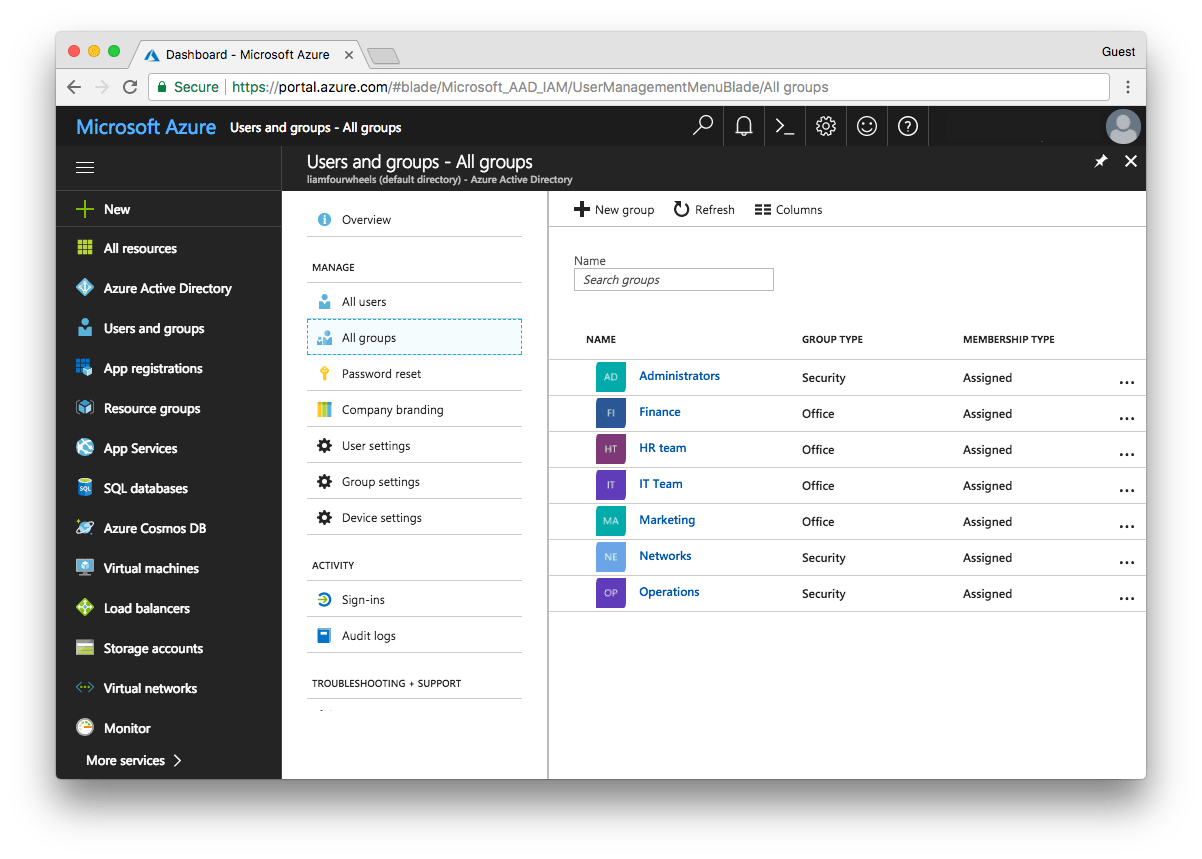
For our demonstration scenario, we are using NGINX Plus to protect a web application that is only available to the Finance group. This is just one of a number of groups defined in Azure Active Directory.

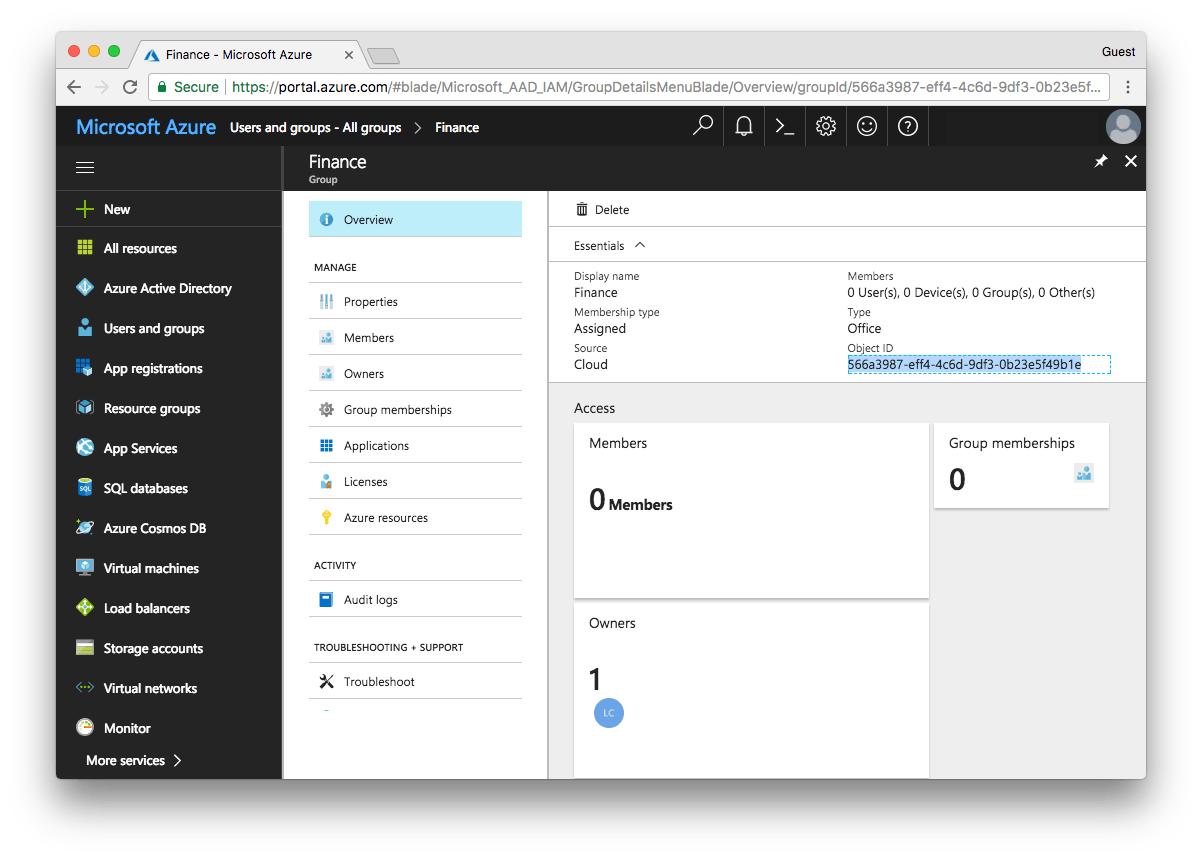
When examining the properties of the Finance group, the unique Object ID is the value that appears in the groups claim for users assigned to this group (highlighted in Figure 4).

The Object ID for our Finance group is 566a3987-eff4-4c6d-9df3-0b23e5f49b1e. We use this value in the NGINX Plus configuration (line 4 below) to ensure that only members of the Finance group can get access to our backend application.
On line 1 we define a variable, $jwt_groups, that evaluates to the value of the groups claim in the JWT. NGINX Plus automatically provides variables for JWT claims; however, if the claim contains special characters, or if the value is an array or a nested JSON object, then the auth_jwt_claim_set directive must be used to access that value. For ease of processing, JSON arrays are evaluated as a comma‑separated list.
We pass this comma‑separated list of group memberships into the map starting on line 3. The result of the map is a new variable, $isFinance, which by default evaluates to 0. A regular expression is used to test whether the $jwt_groups variable contains the Azure Object ID for the Finance group.
The server block starting on line 8 describes a simple reverse proxy for the Finance app. The auth_jwt directive on line 12 specifies that the entire application requires JWT validation and that the JWT itself must be supplied as a cookie named auth_token.
On line 17 we test whether the JWT includes the Finance group by evaluating the $isFinance variable. Users not in the Finance group receive an HTTP 403 error. The user experience for this error can be improved by creating a custom error page (commented line 20).
Requests with a successfully validated JWT containing the Finance group are ultimately proxied to the backend application (line 25). Also, the email claim is proxied to the backend as an additional HTTP header (line 24), where it can be easily consumed by the application.
Summary
The OpenID Connect and JWT standards offer huge flexibility for building applications that require single sign‑on and consume identity information. The example above shows how NGINX Plus can be used as a centralized security service to offload token validation and fine‑grained access control from the backends. The same solution can be used for reverse proxy and load balancing to a web application, or as an API gateway at the heart of a microservices application architecture.
For more information about using JWT with NGINX Plus, please see:
- Authentication and Content-Based Routing with JWTs and NGINX Plus
- Authenticating API Clients with JWT and NGINX Plus
- Authenticating Users to Existing Applications with OpenID Connect and NGINX Plus
To explore the native JWT support in NGINX Plus for yourself, start your free 30‑day trial today or contact us.


